Saturday, November 13, 2010

Blog 6


Trip: Taman Tasik Shah Alam
Group: Le Corbusier
For our project 1, we went to Shah Alam Lake Garden for site visit to do our site analysis. When we first arrived at the lake garden, without hesitation, we started strolling off to find a suitable site to build our viewing tower for our selecte
d toys.

A few steps from out drop-off point, we found a site that can be considered.

This is a picture of the first site we found. This site is located on a higher level compared to other parts of the ground. There are also trees all around the site. But after discussing for awhile, we decided to look around before deciding on our site. That's why we went on walking around the lake garden. Not long after that, we found another location which might be suitable for our site.

A view of the 2nd location. Trees all over the location as well as insects. It's on a higher ground surrounded by bushes. Unfortunately, the site is too big for us to get a 15m x 10m measurement. We couldn't include all the elements we wanted within that measurement. Therefore, we moved on to search for another site which is more suitable.

We walked further through the lake garden. Finally, we found another location.
This location is located right beside the lake. The ground of our site are covered with bricks, thus, there's not much soil or trees can be found there. After a small discussion, we decided to choose this location as our site. So, we started to do our site analysis. We measured, took pictures, researched and even interviewed a worker
of a restaurant near our site.

Views into our site:

Views from our site:

View of our site from the other side of the lake:
After a long day doing our research, a rest is a must!
We sat down on our site, have a drink and compiled the information we got.

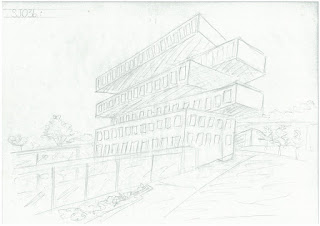
Additional:: a sketch of the perspective with thumbnails.
Blog 6: completed! ;)

Tuesday, October 12, 2010

Blog 5

Sketch Journal 05:
to produce a site plan, thumbnail(s) and perspectives which can be found in Taylor's. The site has to be measured and drawn up in scale.

05: Site Plan & Thumbnails
My group chose our site in front of Truffles which is on the ground floor beside the outdoor amphitheater. We measured the site for 10m x 15m. Above is the image of our site plan in scale of 1:50 which is 1m:2cm. At the side of the site plan, i drawn up 5 thumbnails from the site.

05: Perspective 1
This is a one-point perspective of our site. This perspective is taken from a view outside of our site.

05: Perspective 2
This is a three-point perspective of our site. This perspective is taken from a level above our site which is at the top of the staircase looking down of the site. Although you can't see everything in our site (e.g. the building), but it covers more than 80% of the site.

05: Extra
This is a draft of the site plan according to scale.

Blog 5: completed! ;)

Blog 4

Sketch Journal 04a & b:
o4a - to trace one site plan, plan, section, elevation and perspective of the chosen architect's work
04b - to collect drawing templates and trace
(click on image to enlarge)

For my group, our chose architect is Le Corbusier.
He is one of the pioneers of what now called as Modern Architecture.
I chose he's Sainte Marie de La Tourette.
These are a few images of the building:

04a: Site Plan
This are the site plan of Sainte Marie de La Tourette. I found this in the website: http://www.greatbuildings.com/buildings/Convent_of_La_Tourette.html. Although it does now show the site very specifically, but it still shows briefly on how the site looks like. This site plan is not in scale because i was unable to find the scaled drawing of the building neither on the internet nor the books in the library.

04a: Plan
This is the plan of Sainte Marie de La Tourette. I found this in the same website where i found the site plan. This plan shows the cell floor of the building. There are cells separated with walls as shown in the plan. This plan is not in scale either.

04a: Section
This is the section of Sainte Marie de La Tourette. Found on the same website as the site plan as well as the plan. I couldn't find the section in scale so this section i'd traced us not in scale.

04a: Elevation
This is the elevation of Sainte Marie de La Tourette. I found this on the website: http://www-bcf.usc.edu/~kcoleman/Precedents/ALL%20PDFs/Corbusier_LaTourette.pdf. There is four elevations of the building. The north, south, east and west elevations. This is not in scale.

04a: Perspective
This is the perspective of Sainte Marie de La Tourette. Found this on the same website as the elevation. This perspective is not very complete as it only shows half of one of the side of the building. But it does shows the monastery of la tourette has panes of glasses on the exterior faces allowing light to penetrate, for air to circulate, as well as to provide view out to the woods.

04b: Drawing Templates
I found a few drawing templates online and traced it on butter papers. There are a few symbols of the furnitures, doors and windows as well as symbols to show how air flows, drainage and heating.

04b: Drawing Templates
These are the 2nd page of my drawing templates. The table on the left shows some professional architectural symbols. On the right, i traced 30 different symbols of different species of the trees.

04b: Drawing Templates
This is my 3rd page of the drawing templates. All of these are different types of textures and patterns of floor. There are tiles, stones and surface.

Blog 4: completed! ;)

Monday, October 11, 2010

Blog 3

Sketch Journal 03a & b:
03a - to sketch a plan, 3 perspectives and 2 details around Taylor's U
03b - sketches done during the lecture
(click on image to enlarge)

o3a: Plan
This is a floor plan of Taylor's U. In the plan, I marked "A", "B" and "C" for each of the perspectives I'd drawn. The plan is not in scale.

03a: Perspective A
This perspective is found in the library. On the 3rd floor, there is a bridge over from one side of a building to another building. I drew this in one-point perspective. Other than that, i'd drawn 2 details which is on one of the pillars and also the leg of the chair.

03a: Perspective B
Perspective B can be found in between the international office and the enrolment and admission services centre. Its a small pathway with lift, toilet and offices on both left and right side. I'd drawn this in a one-point perspective. I also drew 2 details for this perspective which is the lighting and the switches on the wall.

03a: Perspective C
This is an external perspective. This perspective i'd drawn is in three-point perspective. It is the commercial block also known as the University Square. I drew 2 details for this perspective which is the roof and also one of the windows on the building.

03a: Extra
This is a draft of the plan before i enlarge it.

03b: Sketch
These are a few sketches drawn during the lecture. We were required to sketch these is 3-5 minutes to train ourselves to sketch on spot. My work are still very roughly done.
Blog 3: completed! ;)

Wednesday, September 29, 2010

Blog 2

Sketch Journal 02a & b: Hatching
02a - to sketch the different types of strokes
02b - to sketch 3 object and 1 perspective applying the strokes
(click on image to enlarge)

02a. Hatching: Zigzag & Crosshatching
The image on the left is zigzag. I did a pretty rough work on it since its the 1st hatching i'd done. I tried to do a smaller one at the side after i'd done the big one as a practice. The zig zag i'd done seems pretty big, maybe i can sketch it smaller. On the right, is crosshatching. I did two of the same object and you can see the difference. Anyway, I'm not really satisfied with my work so i may need more practice on hatchings.

02a. Hatching: Pointillism & Continuous
Starting on the left is pointillism. The first pointillism i did wasn't very neat so i did another small one of the same object. Using pencil to do pointillism is hard work because you'll need to do it very hard in order to have a better effect. Obviously, more practice is needed. Continuous is on the right. I'm not sure if i did it correctly but from my understanding, it's suppose to be sketching with one line continuous. So, i did the outline using one line continuously for the objects.

02a. Hatching: Short Strokes & Scribbles
Short strokes on the left i did wasn't as good as i expected. At the body of the object, i actually use long strokes instead of short strokes. So, i tried to redo another one but it came out similar. I guess i need to learn more on how to actually sketch short strokes instead of long strokes. Right-hand side i did scribbles. I did scribbling the same way i did for zigzag, crosshatching, pointillism and short strokes. I'm not sure if it's the correct way. Anyway, from what i'd learnt from the lecture, scribbles can be used for plants such as trees and bushes.

02b. Hatching: Perspective
When i drew this, i have yet to learn sketching perspective. So, i tried sketching based on what i know. It came out not very satisfying for me. However, i still continue on with this sketch by adding in hatchings i'd learnt previously. i used crosshatching on the curtains, walls and the bed while the table, light and the rings of the curtain, i used zigzag. The pillow, bolster and the blanket, i used pointillism.

02b. Hatching: 3 Objects
From the left, i sketched a chair, a bag and a toy. On the sketching of the chair, i added hatchings of zigzag, crosshatching, short strokes and pointillism. For the sketching of the bag, i used crosshatching, short strokes, zigzag and also scribbles. Last one, the sketching of the toy, i hatched using zigzag, crosshatching and pointillism. I tried mixing as much hatching methods as i can on a sketch. For me, those hatches i did on the sketches doesn't seem connected to each other instead they feel like they're standing on their own. That makes the sketches weird in a way. But i'll try and try again until i find a way to solve this problem.

Blog 2: completed! ;)

Blog 1

My first sketch journal assignment:
to sketch out 3 different toy character,
which i can find within 3cm-10cm.
(click on the image to enlarge)

1. Coraline Figurine
Features:
A figurine of Coraline holding a Coraline doll.
Background:
Coraline is a character from an animation movie named "Coraline".
In the movie, Coraline felt neglected by her parents so she went exploring their new house alone. She discovers a small door in the living room which was locked up. She never knows what was on the other side of the door, a world where everything goes the way she favours!

2. Toshiro Hijikata Phone Strap
Features:
A chibi Toshiro Hijikata phone strap.
Background:
Toshiro Hijikata is a character from an anime named "Gintama".
In the anime, Toshiro is the vice-commander of the Shinsengumi which is the Police Force. He is purportedly the brains behind the force. Toshiro takes his work seriously and is loyal to his leader, the commander of the Shinsengumi.

3. Monkey Key-Chain
Features:
A soft Monkey key-chain.
Background:
This monkey have no name nor a story to come with it.
The brand of the monkey is "Nici".

Blog 1: completed! ;)